Saturday, January 28, 2012

From GastroLab with Love: Pan-fried year cake with eggs (quasi-vegetarian, dessert)


In my previous post, I detailed my first attempt at making a Cantonese year cake using black glutinous rice, regular rice, sugar, and cassia flower.  The cliffhanger at the end may make you wonder what other journey this year cake would take.  Obviously, we all know its final destination (Part toilet, part released as carbon dioxide and water, part converted into energy...), but the journey to the destination is just as fun, and if not more important, than the destination itself (because this is a path function, not a state function damn it!).  For this type of year cake, there are 2 conventional processing options:  pan-fried (see this.  Translated version here.) and fried (see this and this.  Translated versions here and here.  I have to try the taro/sweet potato trick some time because that sounds really good).  My (deceased) grandma, and by extension my mom, both make pan-fried year cake the same way as the pan-fried recipe described.  Childhood nostalgia always taste better than anything else.  

My recipe is pretty much the same way as described in the translated version of pan-fried year cake, though I arrived there via a different path (passed down by my mom, or mostly just by watching her make it over the years).  Here’s a group shot of all the ingredients:  


1 ~4” x 4” x 2” block year cake (I used my black glutinous rice year cake with cassia flower, but you can use store-bought sweet year cake)
1 egg
Approx. 1 tablespoon oil

I used extra virgin olive oil here because that’s what I have on hand.  As a general rule of thumb, you do not use extra virgin olive oil for pan-frying because it has a low smoke point (see here for various oil smoke points.  Pay special attention to ghee, peanut oil, palm oil, coconut oil, and palm oil.  All these oils are commonly used in Asian cuisine and they all have very high smoke points... that’s another post).  

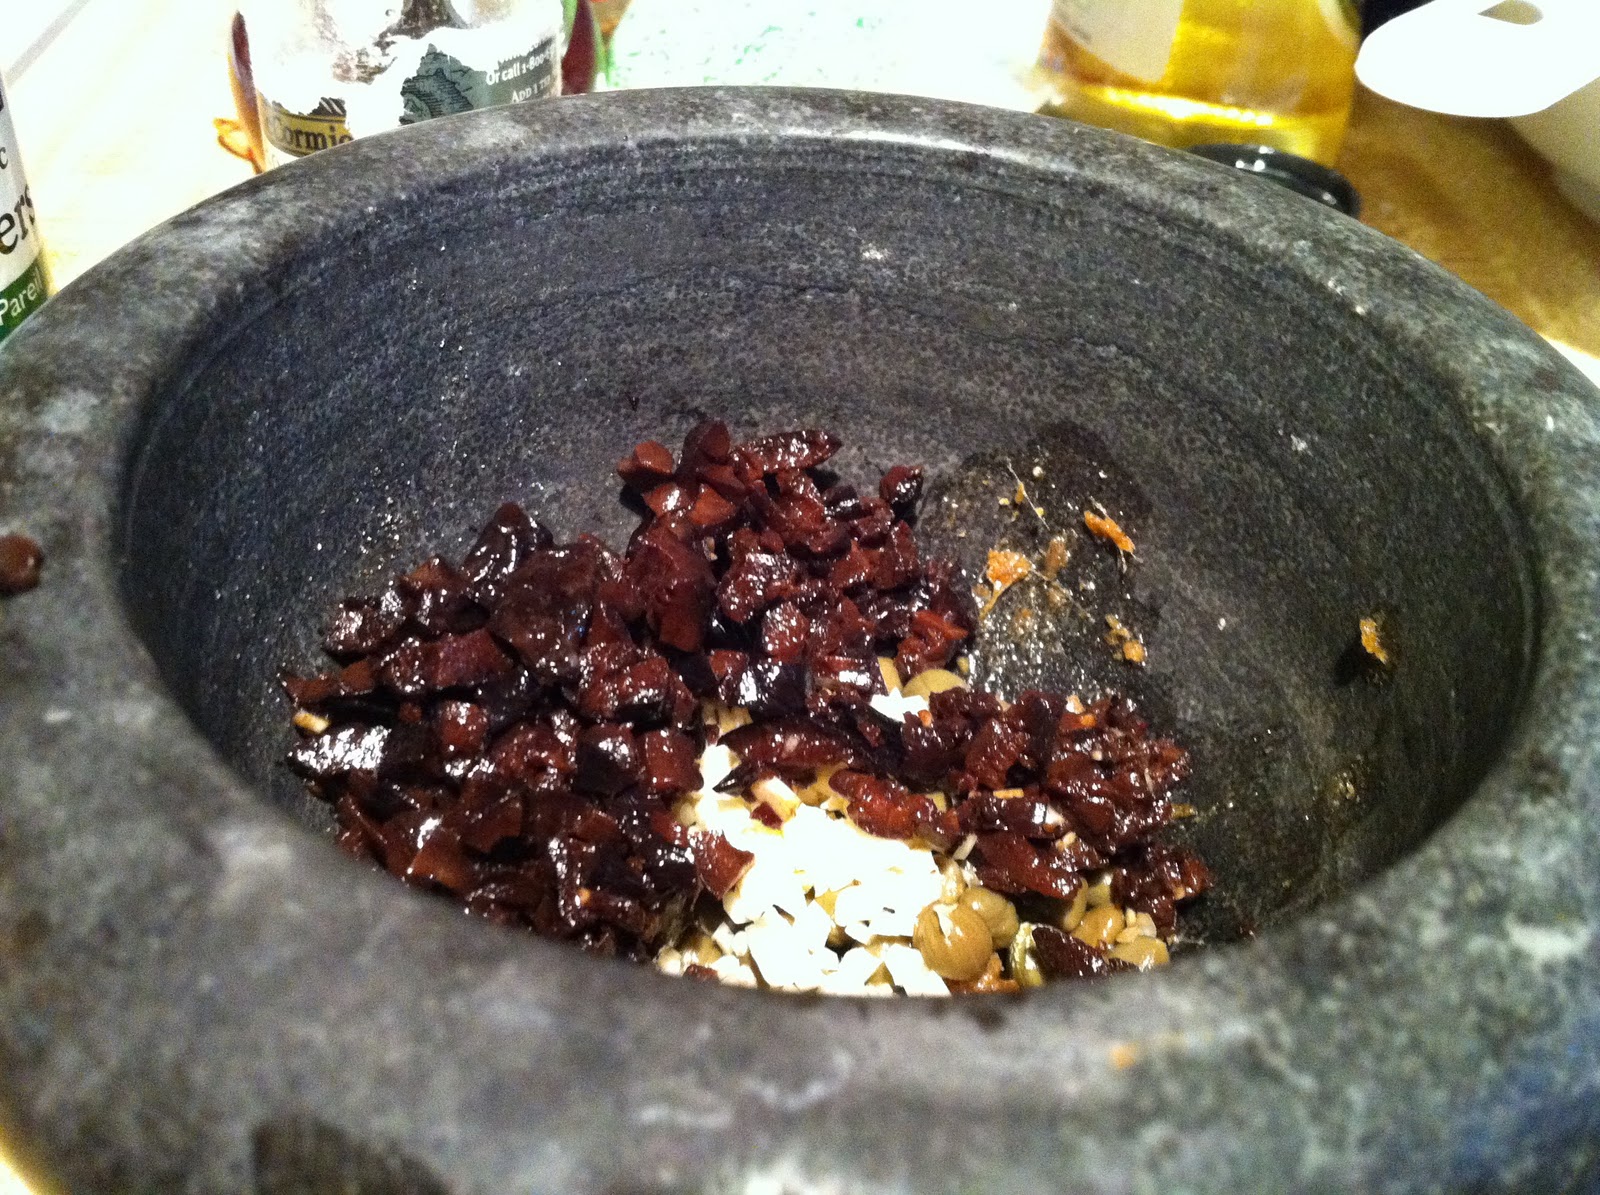
I cut the year cake into several ~2” x 2” x 1/4” pieces, and beat the egg.  Here’s another family photo with everything prep up.  


If you look very closely, you can see the light whitish spots on the year cake.  I was referring to those spots when I talked about the hydration issue in my last post.  

I’m using an electric skillet for this work.  That just happens to be what I had on hand.  As you can see the pan is teflon-coated, but the coating is scratched up.  This may cause sticking.  First, some oil inside a medium-high heat pan...


Next, I dipped the year cake piece by piece into the beaten egg and placed them in the pan.  No pictures for that because I don’t want my phone to get salmonella....  

This shot shows the dipped year cake inside the pan in various flipped states.  


Pieces on the outskirts hadn’t been flipped yet, so they glistened in beaten egg nirvana.  The center pieces had been flipped.  As you can see, flipping forms a nice caramelized egg layer on the bottom.  Some year cake pieces did not adhere too much of the beaten egg though.  This is a common problem.  The adhesion relates to the viscosity of the beaten egg and the year cake’s surface roughness.  The fresh part of the egg whites usually has a higher viscosity than the rest of the egg, so it will cling onto the year cake better.  At the end of the egg-dipping, I had a little bit of beaten egg left, so I just added it right on the year cake in the pan.  I really like extra eggs on my year cake so that worked out really well.  

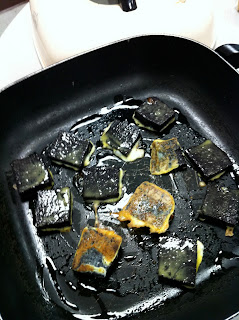
Here’s the finished shot.  


Because of the beaten egg, the year cake picked up a nice layer of char on top.  The egg provided some extra crunch and caramelized protein flavor to the sweet, chewy contrast of the year cake.  It’s almost as good as fried year cake, although as I mentioned earlier, nostalgia tastes better than fresh experience.  A dash of salt in the beaten egg can bring this concoction to a new level of tastiness.  

Total elapsed time:  about 10 - 15 min  

Bon appetit!

Notes:

1.  You can just pan-fry the year cake, but it won’t taste as good because it won’t pick up char like the egg would.  In my opinion, you cannot skip the egg (sorry true vegetarians...)

2.  As for how long the pan-frying should take, it depends on when the egg is cooked and when the year cake is warmed throughout.  A thicker slice or year cake just out of the fridge will also take a longer time to heat through.  Adjust the heat accordingly so you can get the egg coating to cook and the year cake to heat through.  

3.  I really like a higher egg to year cake ratio, so I cut my year cake a bit thinner at the expense of having less of a chewy center.  That’s a personal preference though, and you can cut it however thick you want, but I wouldn’t go too much more than 1/2” thick due to heat transfer issues.  

4.  I would use teflon pan for this application since it can reduce the amount of oil needed for the dish.  If you’re against teflon, use more oil, and be patient when it comes to flipping.  The pieces should detach from the pan when they are cooked.  

Thursday, January 26, 2012

Mad science at work in the GastroLab: Black glutinous rice year cake with cassia flower-- Part 1 (vegetarian, dessert)


Note:  This entry is more experimental than others.  Proceed at your own risk.  

Happy Chinese New Year again!  As I mentioned in my previous post, Chinese New Year (abbrev. CNY) just happened a couple days ago.  CNY is a big deal for Chinese folks, as it’s one of the times the family gets together to enjoy a feast).  An American (emphasis on American) equivalent would be Christmas (the top spot in terms of family gathering goes to the Winter Solstice in Cantonese culture, which is the equivalent of Thanksgiving to my dear American readers).  As a warning to all readers:  there are many kinds of Chinese (and I don’t mean the People’s Republic of China/Republic of China debacle either), and we all celebrate CNY a little bit differently.  What you see here is how my family runs CNY.  Your mileage may vary.  

In the Hong Konger’s tradition, year cake is sweet, chewy, and usually comes in reddish brown color.  A year cake of this style usually consists of glutinous rice (wiki), brown sugar, and water.  Always on the innovative edge, Hong Kongers have made year cake with coconut milk (making the year cake white), ginger, and probably other flavors.  This year, I decided to make a year cake with black glutinous rice.  Black glutinous rice has a distinct flavor that is different from regular glutinous rice.  Just like how the Supreme Court interprets possible pornographic material, I can’t really describe the flavor difference between regular and black glutinous rice, although I would say the extra flavor from black glutinous rice tastes like malt, if you catch my drift.  After doing some research (Chinese here, English here, and I wish I read this before I made this; mute if you don’t like music;  English here), here’s the ingredient list I settled with with a family photo: 


2 cups black glutinous rice
½ cup white rice
½ bar dark brown sugar, approximately 3 - 4 tablespoons
Approx. 1 tablespoon cassia flower jam (wiki for cassia flower-- they sure aren’t pretty, but they smell really good!)  
Enough water to soak all the rice (save the water for later use.  I ended up using about 1 cup of water in all applications combined)
8 Goji berries (for decoration, optional)
1 dried lotus seed (for decoration, optional)


One of the things I do not like about regular year cake is that it is all chew and very floppy-- no body.  My attempt to address that was to add white rice to the mixture to make the steam cake stand up better.  I figured a 80/20 glutinous rice/regular white rice ratio would be a good starting point.  I’ll have a post-game analysis on what can be improved later.  I like the flavors of dark brown sugar (which contains molasses), so that’s what I used for my sweet component.  Cassia flower has a very sweet but fresh scent, which I think would be a great addition to my year cake.  


As with most recipes with a simple ingredient list, there’s a catch, and it’s technique, technique, technique.  The execution of all the steps is now more crucial than ever.  After consulting my mom on her past experience (failed and otherwise) on making Chinese steam cake, I decided to use as little water as possible because viscosity seems to be a big issue when it comes to making a viable steam cake (and as my work folks know, I know all about viscosity... or not).  


In a regular year cake, glutinous rice is already milled into a fine, white powder, which makes the flour-to-batter conversion much easier.  Since there isn’t black glutinous rice flour easily available for sale, I will have to make my own rice batter with dried rice granules.  


Here’s a close-up shot of the pre-re-hydrated rice.  


I started by soaking all my rice in water.  I figured it would take at least 3 hours for the rice granules to be hydrated.


After 4 hours, I strained the rice out of the water and saved the water for other uses.  The water turns purple, which is expected because the (hopefully!) natural colorant is water soluble (and actually, somewhat heat stable too based on my experience).  


To make the rice batter, I needed some hardware.  I went with a bullet blender (yeah I know it’s crappy... but that’s all I can afford), a sieve, and a pan.  


I started by loading the partially re-hydrated rice into the blender...


Then added a couple tablespoons of water to the rice to make sure it blends.  


Water acts as a “lubricant”, and to some degree, a heat sink in this case.  This prevents my blender motor from burning out.  I reused the water from the rice soak.  It has a good color (and probably some good flavorings too) that I don’t want to waste.  As for how much water, it’s probably 4-6 tablespoons per 1 cup of soaked rice.  I erred on the low side because I can’t take water out, but I can always add.  


Here comes the blend!  I watched the blend very closely because I didn’t want the motor to overheat (again, it’s a cheap blender....), and I wanted to make sure that there was enough water in the mixture to help with the blending.  I also did this in multiple batches to make sure everything got blended.  


Here’s what the mixture looks like after the blending process, already loaded onto the sieve.  


I then started squishing the mixture through.  I started with a spatula initially, then decided to go with my bare (but wrapped in plastic... such contradiction) hand and squished it through the sieve.  Because the viscosity is so high, the hand-mushing was much more effective at pushing materials through than a spatula.  This is equivalent to mushing steamed pumpkin through a sieve to make pumpkin puree.  If I ever make pumpkin puree again, this is my method of choice.  I was squeezing hard, but not so hard that it breaks the sieve.  Here's an action shot:  


As the squishing continued, the viscosity of what was left in the sieve climbed.  After many minutes of mushing, here’s the final result.  


I did not take a picture of what was left in the sieve, but there were some large granules of white rice embedded in a very viscous matrix of rice batter.  So viscous, in fact, that it was pretty much like an air hockey puck (it was about 3” in diameter, and probably 2-5mm in thickness.  All you engineers can do the unit conversion... you don’t need my help here) and I had to throw it out.  


I left the rice batter in the fridge overnight.  Partly because by the time I was done mushing, it was really late and I really needed to go to bed.  The other reason was that I think the rice batter may not have been viscous enough so I need some way to separate the water from the batter.  Refrigeration and natural settling seems to be a better way to go.  


The next step is the syrup.  I dissolved the brown sugar in about ¼ cup of soaking water under heat.  


I then added the cassia flower jam to it and let it boil until the sugar dissolved.  


Sugar is certainly boiling and dissolving here....


After a couple minutes, all the brown sugar dissolved.  Notice the yellow specks in the purple syrup...  those are cassia flower pedals.  


While the syrup was still hot, I added it right into the rice batter and mixed vigorously.  


This shows what the mixture look like before it was smoothed out with the mixing.


Since there wasn’t much syrup to begin with, there wasn’t a big temperature change with the batter.  In a regular rice cake, adding hot syrup would make (by adding liquid) and thicken (unraveling of starch granule and re-gelatinizing the starch via heat) the batter simultaneous. However, the viscosity went down a bit in this case because I added syrup but didn't raise the mixture temperature significantly.  To ensure that I would be getting enough gelatinization, I went with some heat on the stove.  

After 2-3 minutes, the batter thickened considerably.  The bottom of the pan had a visible color change (purple-white to darker purple/purple opaque) which indicated the starch re-gelatinized.  It gelled really quickly-- in fact, it was already gelling when I paused the mixing to take this picture!  


I then loaded the mixture to a 5” spring form pan lined with Saran wrap.  The Saran wrap is there to help with de-panning later.  No need to add oil/other lubrication in this case.  


I then folded over the Saran wrap and pressed the mixture down to the pan using a takeout container lid, which happened to be almost the same size as my small pan.  To create a smoother surface, I took another piece of Saran wrap and placed it right on top of the mixture before the squishing.  


Hulk... needs... smashing... something...


This is what it looked like when it was all pushed down and "evenly" distributed.  


After decorating with the lotus seed and Goji berry, I placed it in a steamer and let it steam for 75 minutes.  I think my year cake was done by the 40 minute mark, but I wanted to make sure so I steamed extra time.  The way to check doneness is first insert a sharp object through the cake, then pull out said sharp object and look. If there's still batter on the object, it needs more time. This is just like checking a baked cake's doneness.


Here’s the final result.  


The cake de-panned really easily, thanks to the Saran wrap.  It was also very stiff, likely thanks to the white rice.  When it first came out of the pan, it pretty much held its own shape.  My mom was very surprised because she said the glutinous rice cakes are usually very floppy when it’s hot off the steamer.  Ruh oh.....


Post-game review:    


Texture-wise:  
The cake has body, but not enough chew.  This is probably due to high content of white rice, low content of water, or combination thereof.  


Flavor-wise:  
It can use more cassia flower scent and maybe a bigger hit on the sugar.  There may not be  enough cassia flower scent to go around, or that I added too early so the scents all volatilized when I was heating the syrup.  I’m leaning toward the former.  As for the sweetness, we probably shouldn’t be eating too sweet anyways.  


Presentation-wise:  
I like the purple hue, but it doesn’t carry a lot of shine, and it still has some pits/holes on the side.  The shine problem is caused by the lack of oil in the recipe, and the pits/holes are caused by not pressing thoroughly enough.  


Inside-wise:  
There seems to be some “dry spots” inside the cake, although the dry spots are limited in size.  If there’s not enough or too much water, the starch would not gelatinize.  The fact that this cake actually stayed as a gelled substance (instead of powder or liquid) indicates that there’s enough for gelation to occur, but maybe I’m on the low end of the water activity window.  


Overall future improvement plans:  
1.  Add less white rice (maybe in the 5-10% range, leaning toward 5%)
2.  Use potato starch, corn starch, or combination thereof at 5% loading instead of white rice
3.  Add slightly more water (say 1 tablespoon) for hydration purposes
4.  Add more cassia flower jam (say another 1 tablespoonful), and add it into the rice batter instead of the syrup so the scent has something more concrete to “bind to”
5.  Add a little bit of oil (maybe 1 tablespoon) into the batter for gloss and shine.  This is the trick them restaurants use to make your saute dishes and congee all shiny looking.  
6.  Instead of soaking the rice and then make a batter, maybe turn the dry rice into flour first then re-hydrate via syrup addition, using the regular year cake method.  However, I think the stirring would be pretty difficult by hand because the batter is very viscous and very heavy, which my mom mentioned the pain thereof when we talked about stirring liquid into rice flour to make the batter.  


I’ll try this again at some point in time (probably next CNY) and implement the change to see if it would make a difference.  


So what do you do with this newly minted year cake? Stay tuned for year cake part 2!

Wednesday, January 25, 2012

Notice from MTLair's GastroLab: Mad science at work!

In order to delineate recipes that are safe to try at your own GastroLab from those that are more like chicken scratch and would literally scratch up your kitchen (that's what I would do if I'm a live chicken inside a kitchen), I would like to introduce a new category of postings:  The Mad Science at Work posts.  Posts with this tag would be a lot more risky to make due to factors such as recipes that require more refinement, that would trigger smoke alarms when you make them, or that would cause physical harm if not done carefully.  Mostly, it would be in the require-refinement category.  Stay tuned for the very first post with this tag!  

Monday, January 23, 2012

Happy Chinese New Year!

I wish everyone a year fill with joy, great food, an unstoppable appetite and a full stomach!  I'm planning some Chinese New Year special posts.  Stay tuned... they may pop up in the next few days.  

Saturday, January 21, 2012

From GastroLab with Love: Parmigiana di Melanzani con Sugo alla Puttanesca/Eggplant parmesan with whore sauce (quasi-vegetarian)


I have always told people that I don’t like to go out for Italian food.  Going to a semi-decent Italian restaurant always seems like getting whacked in the kneecaps by the Italian mafia-- where a dollar worth of pasta and 50 cents worth of tomato-sauce-from-a-can can somehow be marked up by 1000% (excluding the tax and tip, of course).  With the exception of pizza (which I have to say, a good pizza is hard to replicate at home because most home ovens would never get as hot as the pizza oven at a real pizza joint, but it can come close), it certainly seems that I can deliver the same punch for way less at home.  Here I present to you one of the many reasons why I do not like to go to an Italian restaurant when I eat out.  

Italians, being passionate, creative people, have some interesting names when it comes to food (see “pick me up”), but none tops spaghetti alla puttanesca--“whore’s style spaghetti.”  I have never tasted a “whore”, but I would think this comes really close-- it’s salty, it’s spicy, it’s a hair “bitter”, it has a nice twang and an almost-meaty flavor, much like a good hour with a quality working girl.  Since the sauce has such a complex flavor profile, I have always wondered how it would work with eggplants, which also have a little bit of bitter in them. Parmigiana di melanzane (or Eggplant Parmesan), another famous Italian dish with fried eggplants, cheese, and tomato sauce, seems like a good foundation to test my hypothesis.  Time to strut my way to my research lab!  

When I have eggplant Parmesan (at “Italian restaurants”), they are usually very greasy on both the outside (from baking sub-par cheese), and the inside (from eggplants’ and bread crumbs’ amazing ability to absorb frying oil).  Biting into a sponge of rancid oils is not exactly my kind of good eats-- hence I make it my mission to find a recipe that does NOT require frying.  After some searching, Iron Chef Batali comes through with this:  a bake, almost lasagna version of eggplant Parmigiana.  Replacing that tomato sauce with sugo alla puttanesca (recipe here) would put us on the right foot forward (and left foot backwards of course, for the best hit).  

Below lists our team players:  

For the Parmigiana part of the dish
5 medium Japanese eggplants (or more, if you like thicker eggplant slices)
¾ lb fresh mozzarella cheese
Freshly grated Parmigiano Reggiano
½ a bunch of spinach (optional)
Handful of black olives (optional.  I believe the type I used was Thete olives-- it’s a dry, wrinkly olive from Whole foods...  will update when I double check)  
Dried parsley
A handful of rolled oats
Extra virgin olive oil, for lubrication and drizzling
Sprinkles of sea salt (or coarse salt) and freshly ground black pepper

For the Puttanesca sauce
600 - 700 g crushed tomatoes (I used a 28 oz can crushed tomatoes, but not all of it)
3 anchovies (that’s what I got in my pantry, but original recipe asks for 4)
Handful of black olives, same type as the Parmigiana dish (NOT optional)
3 garlic cloves
1 tablespoon caper
2-3 small dried chili pepper
Splash of extra virgin olive oil, for saute

I decide to use Japanese eggplant instead of regular eggplant.  I have never really liked the fat, rotund eggplants at the mega marts because the skin on those eggplants is too tough-- and in my opinion, eggplant’s skin carries a bit of eggplant’s distinctive flavor (not to mention, the beautiful, aubergine color).  The only ways you can eat those eggplants are either take the skin off, or grill them to the crispy point, neither of which would work in this application (and I haven’t even started talking about the seeds when them eggplants get real old....)  In contrast, Japanese eggplants’ skin are edible most of the time, and they don’t usually have the big-seeds problem like their cousins would unless they turn 100 in fruit years.  The other change is to use rolled oats instead of bread crumbs.  This is mostly ingenuity at work-- I happened to run out of panko bread crumbs (which I prefer over regular bread crumbs because they have better texture), and rolled oats can be a good crunchy alternative for breading applications sometimes.  

To increase the health quotient (and to use up my groceries), I threw in the spinach.  The olives would give each bite a “hey, there’s something else here” flavor to the dish.  Both of these ingredients are optional, and I would definitely not go overboard as both has very strong flavors.  The goal is to make the aubergine escort shine, not to turn her into a Christmas tree with Chinese New Year decorations on it.  

First, I roasted the eggplant in the oven at 450F.  I grabbed a baking sheet, lube it up, and laid ¼” to ½” longitudinally cut eggplant slices onto it.  After laying them down, I drizzled some olive oil, sprinkled the salt and pepper on top, and popped the tray into the oven.  


Meanwhile, I started making the sauce.  First I crushed the anchovies into a paste.

Then I get all the other ingredients together... for a group shot!  

Now the finely chopped garlic, olive, and capers mingle with the mashed up anchovies.  


I turned the heat to medium-high, threw in some olive oil, and in goes the anchovies mixtures.  I kept on moving the mixture around until I smelled caramelized anchovies.  

In goes the crushed tomatoes and stirring...  Then I put a mesh lid on (anti-splash when bubbling) and let it simmer, stirring occasionally.  

30 minutes later, eggplants are now charred and cooked.  

Some things I learned from this experience:  1.  Lube the pan liberally!  Not enough lubing causes sticking, burn, and pain, just like in real life;  2.  Flip the eggplant for better browning.  On the same line, if you have multiple tray on different levels, make sure you flip their position!  I was watching the eggplant slices very carefully so my damages were mostly under control, but this can end very badly.  Another tip is that the eggplants must be as dry as possible...  I’ll explain why in a moment because the whore finally got her fishnets on and IS READY!  


Took her 20 - 30 minutes... not so shabby huh?  The simmering allows the flavors mingle and concentrate the sauce...  more on why in a moment.  

While everything was cooking, time to prep the spinach, fresh mozz, and the remaining olives.  First, another family photo...


I chopped off the stems on the spinach, chopped the olives into big chunks, and the mozz into ~ ¼” slices.  The spinach stems got the finely diced treatment, and along with the spinach leaves, cooked in the microwave until wilted, about 1 minute.  I rung out as much water as possible in the spinach...  again, more on why in a minute....  (this minute is getting really really long...)  Here’s a shot of the spinach.

Now, time to build the eggplant parmigiana.  First, lube up the baking dish with extra virgin olive oil.  Then, place a layer of the roasted eggplant onto the baking dish.

I then threw in some spinach and olives....

Now in goes the sliced fresh mozzarella...  

Last item on this layer:  the Puttanesca sauce....  

Next layer would be a repeat:  a layer of eggplant....  

Spinach, olives....


Mozzarella cheese and a newcomer:  Parmigiano-Reggiano.  I forgot to add the Parm in the last layer, so I shaved in extra in this layer (and the next one) to compensate.  


Then the sauce!   I think the whore would really like this sandwiched position, don’t you think?  


One more layer of eggplant, spinach, olives...

Mozzarella, Parm...

The last of the sauce!   I sprinkled some dried parsley on this layer.  

No bread crumbs so rolled oats would have to do....

I then popped this into a 350F oven for another ~30 minutes.  The original protocol asked for 15 - 20 min, or until the cheeses melted, I checked it frequently after the 15 minutes mark, but I liked mine a little more charred on top so I left it in for longer.  It would be up to you.  This is what it looked like after it came out from the oven.  

Remember:  the longer the cooking time, the more crunchy the top will be, and the spinach would probably turn more ashen-yellow.  The last part probably doesn’t matter because it would be all embedded into tomato sauce so you likely won’t see it.  

I let it rest for 5 minutes before cutting in.  Here’s a cut-up sliced shot:  

Noticed that the dish is dry:  there is no liquid running on the dish or the plate!  Remember I insisted that the eggplants and spinach must be dry, and the sauce should be concentrated?  This is where it pays off.  Both the eggplants and spinach contain a lot of water, which make them turgid when they are fresh (and that is a tell-tale sign of freshness on most veggies-- a wrinkly, wilted fruits or greens means water has evaporated and the item in question had been sitting around for a while).  When heated, the cell walls in the eggplant and spinach would break, leaking out all the water it retained while it was still alive.  In addition, the pressure applied with the stacking structure would further increase the water leakage.  If you do not roast the eggplant until a lot of the water is evaporated, or not ring out the spinach when finished cooking, all this water would end up in the final dish...  Definitely not good eats.  Sauce, also containing lots of water by nature, would worsen the situation.  By concentrating the sauce, you have paid additional “protection money”-- when the eggplant or spinach are oozing out water (it doesn’t matter how much you dry the food; it will still have some leftover.  Even dried pasta you get at the store aren’t exactly bone-dry-- too little moisture would cause the pasta to crumble into dust), the sauce will absorb some of those liquids and thin out.  The sauce will then in turn baste the eggplants and spinach, mingling all the great flavors.

Hopefully this will convince you to make your own Italian food at home and give the mafia Italian restaurant a boot.  Bon appetit!

Note:  

In my humble opinion, the whore sauce is not a whore sauce without anchovies.  Anchovies have a complex flavor profile that gives the sauce this seductive, pull-your-soul-in quality.  If you don’t like anchovies, here are your options:  

1.  Use less of it!  You won’t taste the fishiness in the sauce because it has so much going on.  If you can’t do 3, add 2.  If you can’t do 2, add 1.  Life is too short to be picky!  

2.  If you absolutely cannot stand anchovies, you can skip it.  The Neapolitan version of the Puttanesca sauce does not contain anchovies and it is still a puttanesca sauce, but it’s really not the same.  

Other words of cautions:  

3.  I do not recommend turning this dish into a meatatarian dish as the puttanesca sauce already has enough body (haha, get it? body...) to carry this dish.  Adding meat would not necessarily ruin the dish, but you would lose the opportunity to experience the whore in an aubergine environment.  

4.  If you would eat this as a leftover dish (and I think you can and should...  the flavors do not degrade over many nights, just like you would not forget a great night with a great courtesan for years to come...) and go with the oat option, be mindful that the oats will absorb some of the liquids and gelatinize.  That should not be a problem, and it may be an added bonus from keeping the food dry... if you count that as an added bonus.  

5.  Speaking of leftovers, the best way to reheat this is microwave slightly first then put it under the broiler for a couple minutes to get the top crunchy again, but I understand that can create more pain and frustrations if you’re really hungry (and you would absolutely be frustrated because no one can resist the smell of a good whore.)