Showing posts with label quasi-vegetarian. Show all posts

Saturday, January 4, 2014

From Gastrolab with Love: Cranberry-Orange-Oat-Flax Seed Scones

The holiday season brought me ample time and a well-stocked, usable kitchen.  I was thinking of things to do to kill time, and baking comes to mind.  

On New Year's Eve, I got a text from my brother asking whether I would like to head to his friend's place for a Space Needle firework viewing New Year's Eve party.  The conversation went approximately as follow: 

Bro:   Friend has a New Year's Eve party.  Wanna come?  By the way, are you making scones?
Me:    Yeah.  I was planning to test some substitutions on a recipe.  
Bro:   What are the scones for?  
Me:    Killing time?  
Bro:   That reminds me:  I need to bring some stuff to the party and I don't know what to bring...
Me:    I can make extra...  
Bro:   Can you?  By the way, is this plain or with stuff in it? 
Me:   Cranberry oats.  

So...  That's how I got committed into making the scones.  I was a bit hesitant because this is truly a new test recipe that I haven't tried and I'm about the release the kraken...  

The exact recipe I used is as follow.  This should cut about 16 normal size scones, or 24 mini scones.  See the description after the procedure on how to simplify the recipe.  

340 g  Whole wheat bread flour (~ 2.4 C)
150 g  Flax seed meal (~ 1.1 C)
100 g  Sugar (~1/2 C) 
1/2 t     Salt 
1.5 t     Baking soda
2 t        Baking powder 
5/8 C   Unsalted butter, cold (that's about 1 stick plus 2 tablespoons)
6 T       Virgin coconut oil, room temperature (solid) 
120 g  Rolled oats (~1.5 C) 
2          Zest of oranges, chopped into fine shreds.  No white parts from the orange please!
1 C      Plain Greek Yogurt 
1/2 C  Milk 
1 C     Dried cranberries 
1/4 - 1/2 C Coarse sugar (demerara, sugar-in-the-raw works great) 

Now, the procedure: 

1.   Coat the dried cranberries and orange zest with a little bit of bread flour 
2.   Mix bread flour, flax seed meal, salt, sugar (not the coarse sugar), baking powder, baking soda, and rolled oats together 
3.   Add dried cranberries and orange zest to #2.  Mix.  
4.   Cut butter and coconut oil to small pieces and dump into #3 
5.   Using your hands or pastry cutter, knead the butter and coconut oil into #3.  Make sure the fats are thoroughly cut into #3.  If it's properly kneaded, you should be able to form the mixture in the fist of your hands when you squeeze on it.  
6.   If it's hot outside, place #5 in the fridge to chill so that the fats would solidify again.  
7.   Mix Greek yogurt and milk together until smooth 
8.   Preheat your oven to 375F.  Line baking trays with parchment paper.  
9.   Pour a thin layer of coarse sugar on a flat plate and set it next to your dough-working station. 10. Mix #5 with #7 with your hands until the dough just formed.  Adjust liquid level as need to make sure the dough is not sticky or too dry.  DO NOT OVER-KNEAD!
11.  Toss #10 onto a lightly floured working surface.  Cut #10 into somewhere between 16 - 24 pieces in the shapes you like.  I usually do round disks or triangles.  
12.  Press the pieces from #11 onto the plate of coarse sugar individually.  Try to press and coat around all sides except the bottom.  Place sugar-coated pieces onto baking trays.  Add more coarse sugar onto the plate as-needed.  
13.  Put baking trays in the oven for ~15 - 20 minutes, or until the scones are done.  

As you can see, the recipe is a bit more complicated than normal.  You can make the following changes below to turn the recipe into a simpler one:  

A.  Replace whole wheat bread flour and flax seed meal entirely with all purpose flour.  
B.  Replace virgin coconut oil with butter
C.  Replace milk and plain Greek yogurt with plain drinkable kefir, and adjust the total liquid level down to approximately 1 1/3C, depending on how the dough looks.  

Of course, if you make changes on A (and maybe B), the scones would not be as "healthy."  B is debatable depending on the current reputation of "healthy fats" a.k.a. butter vs. coconut oil:  what's healthier? media hype.  I call the current version "sugar-coated poison" because it is mostly healthy minus the heaping loads of sugar.  

Also, the flax seed meal part can be substituted with oat flour (tried and works), almond meal (haven't tried, but should work), or any other non-gluten filler material.  This works because the whole wheat bread flour contains just enough gluten to hold up the scones, but not enough to make it bread-like.  That is why if you remove the flax seed meal, you should use all purpose flour instead.  The texture would be all wrong if you use all bread flour.  

As for the coconut oil, I notice that it doesn't soften like butter when touched, but rather have a sharper phase change point.  You may need to work a little harder to break the coconut oil into pieces during the kneading fat process (step 5).  I haven't tried using all coconut oil on this, but in theory it should work.  I think the pastry would be less flaky though.  

If you happen to have buttermilk around, you can also use buttermilk in place of plain kefir.  I just figured that you can drink the kefir/eat the Greek yogurt but can't drink the buttermilk so I make that change.  My family would not drink kefir so I bought Greek yogurt and milk which I know would be consumed before expiration date.  

Keep the dough somewhat chilled before you place everything in the oven would be a good practice as the fats would melt and the gas-forming reactions would be faster under warm temperature.  Chilling the dough would slow the reaction somewhat and keep the fats from melting.  

Hope you enjoy this recipe and happy new year!  In case you wondered, the scones were a hit!

PS  Thanks family and friends for being my guinea pigs!  Your feedback is greatly appreciated!  

Wednesday, February 8, 2012

From GastroLab with Love: Bonito Fish Stock Essence Fried Rice (quasi-vegetarian)


One of the most famous Chinese dishes (besides chop suey, whose mythical origin is unclear) is fried rice.  I imagine most Chinese culinary enthusiasts have had fried rice at least once during their tenure.  Some may have even attempted to make it at home.  I would dare say that virtually every Cantonese family has made fried rice at home at least once a year if the family dines at home.  For most, fried rice is a great way to get rid of day-old rice:  it’s tasty, it’s quick, and it takes care of the leftover problem.  At least, that’s how my mom runs my family’s culinary ship (the other is to make leftover rice porridge, a Chiu Chow specialty, but that’s another show).  Since fried rice is made with leftover rice at home, my parents usually tell us not to order fried rice when we’re out, especially in the US, “because all those are day-old rice”, as they would say.  I’m not exactly sure how a typical restaurant would have unintentionally leftover so much rice that there would be enough to sell as fried rice the next day, so this leads to two possible conclusions:  

1.  They deliberately save enough leftover, day-old rice, accounting for their fried rice business the next day
2.  They do not use day-old rice for fried rice

Of course, one doesn’t preclude another.  It’s possible that they use a hybrid of method, but option 2 sounds more reassuring.  

I happened to have leftover rice at home today.  Since I haven’t made fried rice for a while, I decided to make some.  A family friend (super awesome cook, by the way; made a 15 course meal for my family a couple years back when we visited her in Vancouver.  I have never been so full in my life...) passed the secret ingredient list to me.  Check out the family shot below:


Super simple ingredient list:  
2 cups cooked rice (I have a mixture of red and white rice here, but white rice is fine)
2 eggs
1 packet (4 grams) bonito fish soup stock essence
Salt (not shown)
White pepper (not shown)

The secret ingredient is the bonito fish soup stock essence.  Here’s a shot of the packet I used.  It’s already in 4 gram packs, but if you ended up finding a big box of bonito fish soup stock essence, I would use about ¾ - 1 teaspoon.  This already contains salt so unless you like your food very salty, no extra seasoning is required.  


As with all simple recipes, it’s all about the ingredients and technique, technique, technique.  You can deduce from my prelude that there is another option for rice dishes besides leftover rice.  Obviously, the rice will have to be cooked beforehand, but what other witch-sorcery do we need to apply to make this fried-rice-eligible?  

As it turns out, the first question we need to ask is:  what makes a good fried rice?  A good fried rice has rice kernels that are dry on the outside but still tender on the inside (a sign of good moisture control).  It is not clumpy, not oily, allows one to taste every ingredient in one bite, and ideally tastes of a wok’s air (or wok hei, which is what it sounds like in Cantonese).  If a dry, non-clumpy fried rice is optimal, then we need to start with dry, non-clumpy cooked rice.  When freshly cooked and steamy hot, either in a rice cooker or over a stove, the rice still carries a lot of moisture:  some of this escapes via steam and some stays with the rice to keep it hydrated.  Moisture is the worst enemy of fried rice:  there will be no dry-on-the-outside rice kernels if the rice is still moist.  Also, moist rice kernels stick together-- another enemy of fried rice.  Once the rice cools down, and provided your water to rice ratio is correct, the steaming will eventually cease, the outsides of the rice kernels will also dry up a little bit and thus promotes de-clump slightly.  This will make a good stock for fried rice.  In a restaurant setting, they would turn on a big fan and have crosswind blowing over the freshly cooked rice to cool and dry the outside.  Once in a while, a kitchen helper (usually an apprentice) would come over and stir the rice for de-clumping, even drying and cooling.  De-clumped rice at room temperature would be ideal for fried rice.  Leftover rice, having sat around for some time, would have already been cooled and meet the dry criterion.  However, sometimes the kernels clump up so you will have to break the clumps apart before starting the process.  Another possible problem with leftover rice is that some of the rice flavor may have been lost as it ages.  Usually, this is not too much of a problem since most fried rice are doctored up to the 9th degree, but I figured I would mention it here.  I would also make sure the leftover rice is back to room temperature before the cooking process.  While the sauteing process provides additional heat to heat up the rice, a shorter thermal journey ensures the rice will be dry on the outside, but still tender on the inside.  

After declumping my leftover rice, I turned my attention to the eggs.  I beat the eggs and added a small amount of salt and white pepper for seasoning.  The white pepper helps take away some of the “eggy but gamey/fishy” smell.  


Once the eggs and the rice are ready, it’s time to saute!  NOTE:  check your ventilation before you start turning up the heat.  This can be a high smoke (or at least, smell of grease) process because the cooking will be done at very high heat.  Obviously, there’s smoke in the kitchen. So you better hide your books, hide your clothes, and hide your linens ‘coz it’s getting very smoky out here (Thanks Antoine!).  All kidding aside, items that absorb smell and within 50 miles (er, I mean, 7 ft or so...  Chernobyl reference) of the kitchen area should be removed if you don’t want it to succumb to grease/smoke.  If possible, you should crack the outside window or door that is closest to the kitchen open to get the smell out.  Most home range hood units are useless to counter this smell unless they are exhausted to the outside and contain a powerful blower that will suck all the food smell out;  these type of units don’t typically exist in an American kitchen.  Another important point:  make sure you have everything in place before you get this started!  Once you start the sauteing process, it will be a fast-going freight train and you do not want to mess around.  If you do, the food will stick and burn, just like the runaway train on Unstoppable.  

Warning aside, I would like everyone to meet my smoking hot, cast iron wok:  


What’s the smoke?  That’s the leftover seasoning on the wok.  The seasoning is one of the keys to mostly non-stick performance that you can achieve via a non-teflon pan (more on seasoning later).  The wok needs to be smoking hot because a.  who doesn’t like to be smoking hot, and b. more importantly, this is how you generate “wok hei.”  A great saute is nothing without wok hei.  Scientifically, “wok hei” should be the volatile and non-volatile by-products of amino acids, carbohydrates, and maybe very little bit of fat pyrolysis (for amino acids reacting with carbohydrates, it’s called Maillard reaction).  For pyrolysis to occur, there must be extreme heat, low oxygen and minimal moisture.  A smoking hot wok provides the heat, and the dry surfaces of the rice would allow for pyrolysis to occur.  Since the amount of air trapped in between the surface of the cooking item and the surface of the wok is minimal, combustion will only occur in a very small amounts. It’s hard to describe the taste of wok hei, but you can certainly taste it (which is likely mostly smell considering it’s usually the upper part of my mouth that “tastes” it), and sometimes smell it from afar when a dish has wok hei.  The tricks are to turn the hottest burner (usually the largest one on the electric stove, and you would have to muck around to find out which one is the most powerful on a gas stove) to the hottest setting, then you (patiently) wait for the element and the wok to heat up.  A thicker cast iron wok will hold the heat in better, giving you better results.  

The next item on the agenda is to make scrambled eggs.  Some of you may have experienced eggs sticking to the cooking vessel when you cook with a non-teflon surface.  Here’s a good restaurant trick:  hot wok, cold oil.  Start with an extremely hot wok.  Then pour a little bit of oil to coat the surface.  After that, dump all the oil into a different vessel, put the wok back on the stove, and add in enough cold oil (I believe I added about 2-3 tablespoon).  The beaten eggs (or whatever you would like to cook) go in right after.  

I added my first coat of oil here.  


Following the mostly-non-stick protocol listed earlier, I dumped the oil and added more cold oil.  The beaten eggs then went into the wok.  


Then I started stirring and mixing.  This is the scrambled egg part of the program.  Here’s an action shot.  


I then removed the eggs and loaded them in a bowl once they were mostly cooked.  Check out the wok in the picture here.  Minimal sticking!  


Why are the eggs cooked first?  Remember, a great fried rice’s worst enemy is bad moisture control.  Just as we did everything to prevent moisture saturation with the rice, we should not ruin our progress and over-saturate the rice with the eggs since they contain high level of moisture.  Adding the uncooked eggs with the fried rice would delay pyrolysis because most moisture must be driven out first before pyrolysis can occur.  Also, the eggs would have taken more than 2 minutes to cook.  If the rice is cooked for too long, eventually the kernels will be dehydrated and it will make the rice too hard to eat (although in this case, it won’t be too much of a concern because there’s plenty of moisture with the eggs).  This principle applies to anything else that you would like to add to the fried rice.  If you do add the eggs in with the rice, it can be done, just keep in mind that your cooking time will be significantly longer.  

After removing the eggs, I waited for the wok to reheat, and repeated my mostly-non-stick protocol.  I then added the rice and kept it moving.  If you have the strength and the finesse to do the wok toss (拋鑊 in Cantonese, here’s how you do it), this is the time to do so.  Do you need to do the wok toss to get the wok hei?  No, but you’ll be charming all your potential partners because it’s really cool looking.  Sorry for the blurry shot. It's supposed to be me in action!


The goal is to char the outside of the rice without drying the rice or having sticking issues.  Keeping the rice moving will help with all of the above.  After stirring for about 20 - 30 seconds or so, I added the bonito fish soup stock essence and mixed it up.


I then added the eggs back in and stirred.  I also used my stirring metal spoon to break the eggs apart a little more so the chunks are smaller.  


Another 20 - 30 seconds later, time to evacuate.  And look ma, no sticking!  


Here’s the finished product.  


Total elapsed time:  15 - 20 min, with actual wok time around 5 min.  

This is only the beginning of the fried rice journey.  As long as you follow the key points in this post, you can make any kind of fried rice you like.  

Key points recap:

a.  Rice must not be still steaming!  The rice surface must be a little dry.  
b.  The rice must not be too sticky or moist.  Watch your water level carefully when you cook the rice.  
c.  Rice must be de-clumped before cooking.  Room temperature is ideal, but a little warmer than that is probably OK as long as it doesn’t violate rules a and b.  
d.  Use ultra-high heat to achieve best wok hei.
e.  Use the hot wok, cold oil protocol on a seasoned cast iron wok to achieve minimal sticking.  
f.  Pre-cook anything that has a longer cooking time than 2 minutes, or has high moisture content.  If the rice is cooked too long it will dry up both on the outside and the inside.  

Bon appetit!  

Notes:  

1.  Fried rice doesn’t taste as good without eggs, but you can skip the eggs and add in veggies if you like.   

2.  If you like the eggs, but also like veggies, adding veggies would not impart bad flavors to this dish.  My family usually throws in a handful of the frozen mixed vegetables (you know, the kind with carrots, corn, peas, and somehow green beans...).  Since they’re small, you can throw them in with the rice and they will defrost and cook by the time the dish is done.  Refer to rule f when in doubt.  

3.  I would not add meat to this dish because the bonito fish soup stock essence already carries the flavor you need.  

4.  If you like your fried rice to look a little brown, you can add about 1 tablespoon dark soy sauce.  The key is to be able to spread the soy sauce evenly throughout the dish, which means you may have to also add a small (likely equal) amount of water/soy sauce (in that order) to provide enough volume for spreading it around.  Dark soy sauce’s color bodies are very potent (unlike its salt content, which is very weak in comparison to regular soy sauce), and the axiom “less is more” is definitely true here.  I didn’t add it in mine because I already have color from the red rice.  

5.  If you would like to make other kinds of fried rice, any ingredients are probably good as long as you follow rule f.  Remember smaller pieces cook faster, and uncooked meat/protein would likely take longer than 2 minutes to cook.    

Saturday, January 28, 2012

From GastroLab with Love: Pan-fried year cake with eggs (quasi-vegetarian, dessert)


In my previous post, I detailed my first attempt at making a Cantonese year cake using black glutinous rice, regular rice, sugar, and cassia flower.  The cliffhanger at the end may make you wonder what other journey this year cake would take.  Obviously, we all know its final destination (Part toilet, part released as carbon dioxide and water, part converted into energy...), but the journey to the destination is just as fun, and if not more important, than the destination itself (because this is a path function, not a state function damn it!).  For this type of year cake, there are 2 conventional processing options:  pan-fried (see this.  Translated version here.) and fried (see this and this.  Translated versions here and here.  I have to try the taro/sweet potato trick some time because that sounds really good).  My (deceased) grandma, and by extension my mom, both make pan-fried year cake the same way as the pan-fried recipe described.  Childhood nostalgia always taste better than anything else.  

My recipe is pretty much the same way as described in the translated version of pan-fried year cake, though I arrived there via a different path (passed down by my mom, or mostly just by watching her make it over the years).  Here’s a group shot of all the ingredients:  


1 ~4” x 4” x 2” block year cake (I used my black glutinous rice year cake with cassia flower, but you can use store-bought sweet year cake)
1 egg
Approx. 1 tablespoon oil

I used extra virgin olive oil here because that’s what I have on hand.  As a general rule of thumb, you do not use extra virgin olive oil for pan-frying because it has a low smoke point (see here for various oil smoke points.  Pay special attention to ghee, peanut oil, palm oil, coconut oil, and palm oil.  All these oils are commonly used in Asian cuisine and they all have very high smoke points... that’s another post).  

I cut the year cake into several ~2” x 2” x 1/4” pieces, and beat the egg.  Here’s another family photo with everything prep up.  


If you look very closely, you can see the light whitish spots on the year cake.  I was referring to those spots when I talked about the hydration issue in my last post.  

I’m using an electric skillet for this work.  That just happens to be what I had on hand.  As you can see the pan is teflon-coated, but the coating is scratched up.  This may cause sticking.  First, some oil inside a medium-high heat pan...


Next, I dipped the year cake piece by piece into the beaten egg and placed them in the pan.  No pictures for that because I don’t want my phone to get salmonella....  

This shot shows the dipped year cake inside the pan in various flipped states.  


Pieces on the outskirts hadn’t been flipped yet, so they glistened in beaten egg nirvana.  The center pieces had been flipped.  As you can see, flipping forms a nice caramelized egg layer on the bottom.  Some year cake pieces did not adhere too much of the beaten egg though.  This is a common problem.  The adhesion relates to the viscosity of the beaten egg and the year cake’s surface roughness.  The fresh part of the egg whites usually has a higher viscosity than the rest of the egg, so it will cling onto the year cake better.  At the end of the egg-dipping, I had a little bit of beaten egg left, so I just added it right on the year cake in the pan.  I really like extra eggs on my year cake so that worked out really well.  

Here’s the finished shot.  


Because of the beaten egg, the year cake picked up a nice layer of char on top.  The egg provided some extra crunch and caramelized protein flavor to the sweet, chewy contrast of the year cake.  It’s almost as good as fried year cake, although as I mentioned earlier, nostalgia tastes better than fresh experience.  A dash of salt in the beaten egg can bring this concoction to a new level of tastiness.  

Total elapsed time:  about 10 - 15 min  

Bon appetit!

Notes:

1.  You can just pan-fry the year cake, but it won’t taste as good because it won’t pick up char like the egg would.  In my opinion, you cannot skip the egg (sorry true vegetarians...)

2.  As for how long the pan-frying should take, it depends on when the egg is cooked and when the year cake is warmed throughout.  A thicker slice or year cake just out of the fridge will also take a longer time to heat through.  Adjust the heat accordingly so you can get the egg coating to cook and the year cake to heat through.  

3.  I really like a higher egg to year cake ratio, so I cut my year cake a bit thinner at the expense of having less of a chewy center.  That’s a personal preference though, and you can cut it however thick you want, but I wouldn’t go too much more than 1/2” thick due to heat transfer issues.  

4.  I would use teflon pan for this application since it can reduce the amount of oil needed for the dish.  If you’re against teflon, use more oil, and be patient when it comes to flipping.  The pieces should detach from the pan when they are cooked.  

Saturday, January 21, 2012

From GastroLab with Love: Parmigiana di Melanzani con Sugo alla Puttanesca/Eggplant parmesan with whore sauce (quasi-vegetarian)


I have always told people that I don’t like to go out for Italian food.  Going to a semi-decent Italian restaurant always seems like getting whacked in the kneecaps by the Italian mafia-- where a dollar worth of pasta and 50 cents worth of tomato-sauce-from-a-can can somehow be marked up by 1000% (excluding the tax and tip, of course).  With the exception of pizza (which I have to say, a good pizza is hard to replicate at home because most home ovens would never get as hot as the pizza oven at a real pizza joint, but it can come close), it certainly seems that I can deliver the same punch for way less at home.  Here I present to you one of the many reasons why I do not like to go to an Italian restaurant when I eat out.  

Italians, being passionate, creative people, have some interesting names when it comes to food (see “pick me up”), but none tops spaghetti alla puttanesca--“whore’s style spaghetti.”  I have never tasted a “whore”, but I would think this comes really close-- it’s salty, it’s spicy, it’s a hair “bitter”, it has a nice twang and an almost-meaty flavor, much like a good hour with a quality working girl.  Since the sauce has such a complex flavor profile, I have always wondered how it would work with eggplants, which also have a little bit of bitter in them. Parmigiana di melanzane (or Eggplant Parmesan), another famous Italian dish with fried eggplants, cheese, and tomato sauce, seems like a good foundation to test my hypothesis.  Time to strut my way to my research lab!  

When I have eggplant Parmesan (at “Italian restaurants”), they are usually very greasy on both the outside (from baking sub-par cheese), and the inside (from eggplants’ and bread crumbs’ amazing ability to absorb frying oil).  Biting into a sponge of rancid oils is not exactly my kind of good eats-- hence I make it my mission to find a recipe that does NOT require frying.  After some searching, Iron Chef Batali comes through with this:  a bake, almost lasagna version of eggplant Parmigiana.  Replacing that tomato sauce with sugo alla puttanesca (recipe here) would put us on the right foot forward (and left foot backwards of course, for the best hit).  

Below lists our team players:  

For the Parmigiana part of the dish
5 medium Japanese eggplants (or more, if you like thicker eggplant slices)
¾ lb fresh mozzarella cheese
Freshly grated Parmigiano Reggiano
½ a bunch of spinach (optional)
Handful of black olives (optional.  I believe the type I used was Thete olives-- it’s a dry, wrinkly olive from Whole foods...  will update when I double check)  
Dried parsley
A handful of rolled oats
Extra virgin olive oil, for lubrication and drizzling
Sprinkles of sea salt (or coarse salt) and freshly ground black pepper

For the Puttanesca sauce
600 - 700 g crushed tomatoes (I used a 28 oz can crushed tomatoes, but not all of it)
3 anchovies (that’s what I got in my pantry, but original recipe asks for 4)
Handful of black olives, same type as the Parmigiana dish (NOT optional)
3 garlic cloves
1 tablespoon caper
2-3 small dried chili pepper
Splash of extra virgin olive oil, for saute

I decide to use Japanese eggplant instead of regular eggplant.  I have never really liked the fat, rotund eggplants at the mega marts because the skin on those eggplants is too tough-- and in my opinion, eggplant’s skin carries a bit of eggplant’s distinctive flavor (not to mention, the beautiful, aubergine color).  The only ways you can eat those eggplants are either take the skin off, or grill them to the crispy point, neither of which would work in this application (and I haven’t even started talking about the seeds when them eggplants get real old....)  In contrast, Japanese eggplants’ skin are edible most of the time, and they don’t usually have the big-seeds problem like their cousins would unless they turn 100 in fruit years.  The other change is to use rolled oats instead of bread crumbs.  This is mostly ingenuity at work-- I happened to run out of panko bread crumbs (which I prefer over regular bread crumbs because they have better texture), and rolled oats can be a good crunchy alternative for breading applications sometimes.  

To increase the health quotient (and to use up my groceries), I threw in the spinach.  The olives would give each bite a “hey, there’s something else here” flavor to the dish.  Both of these ingredients are optional, and I would definitely not go overboard as both has very strong flavors.  The goal is to make the aubergine escort shine, not to turn her into a Christmas tree with Chinese New Year decorations on it.  

First, I roasted the eggplant in the oven at 450F.  I grabbed a baking sheet, lube it up, and laid ¼” to ½” longitudinally cut eggplant slices onto it.  After laying them down, I drizzled some olive oil, sprinkled the salt and pepper on top, and popped the tray into the oven.  


Meanwhile, I started making the sauce.  First I crushed the anchovies into a paste.

Then I get all the other ingredients together... for a group shot!  

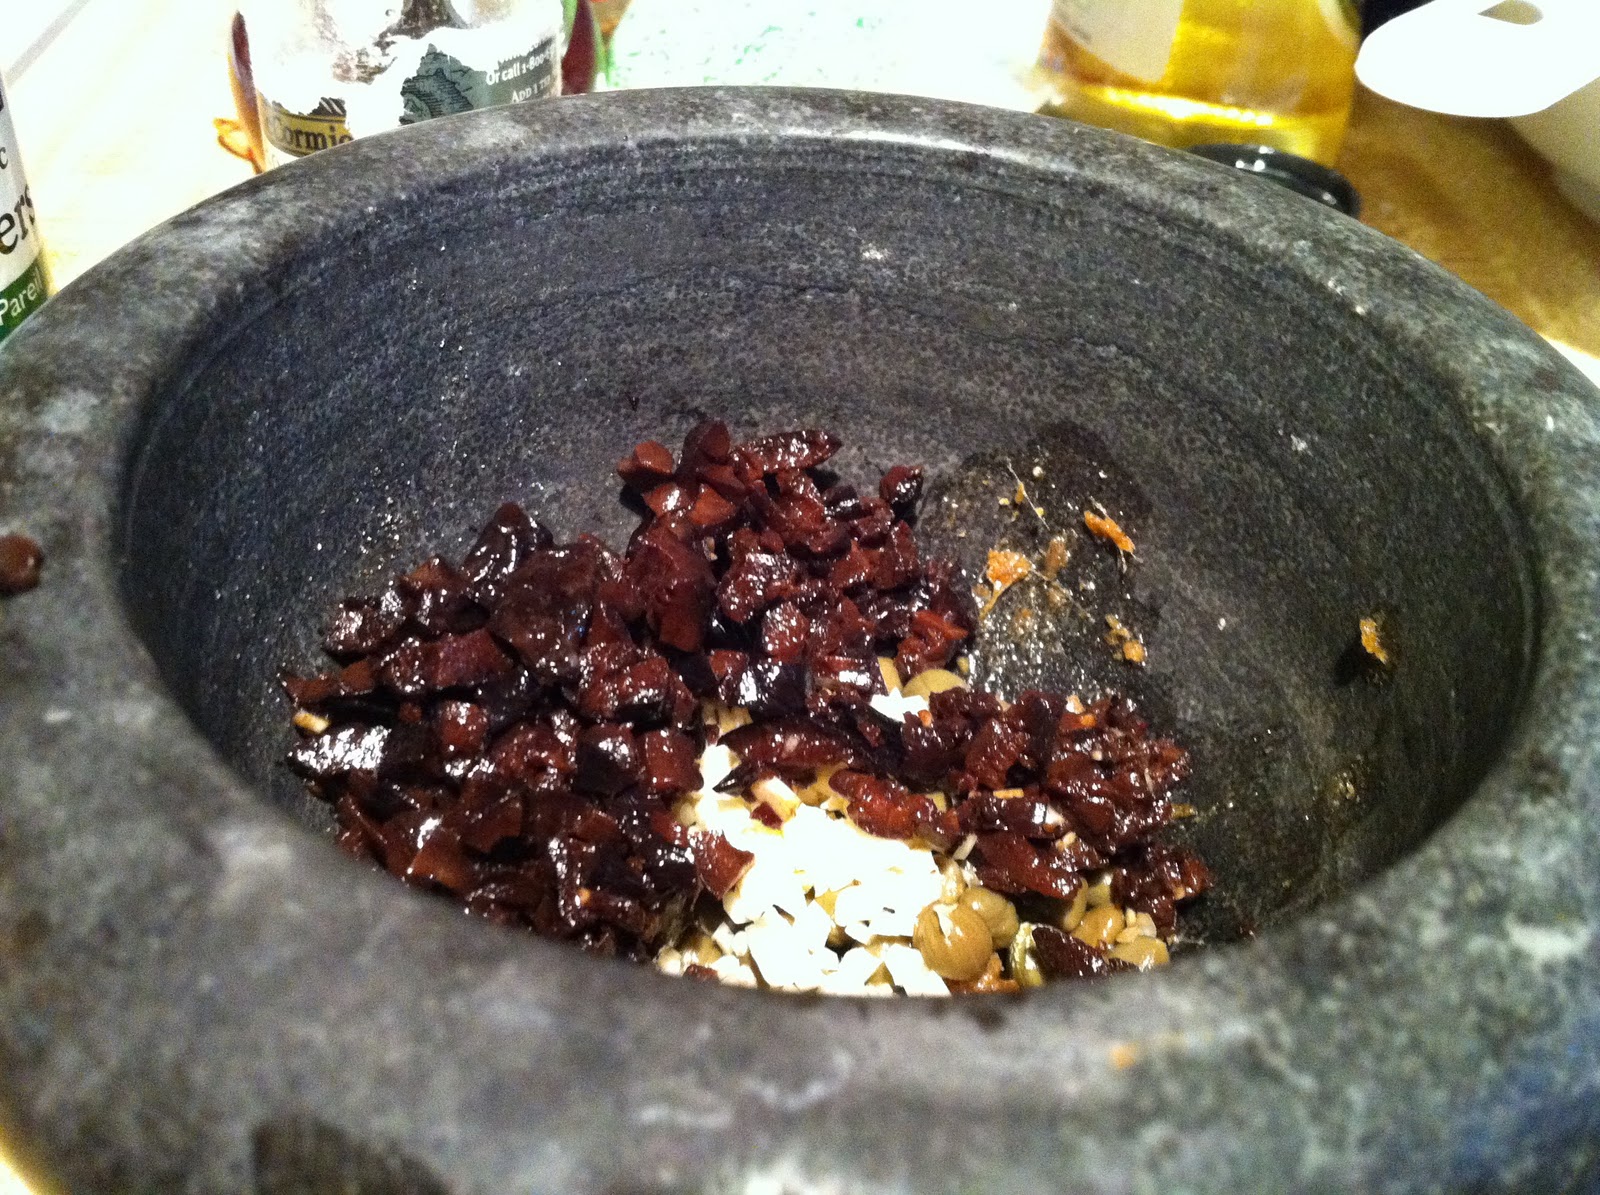
Now the finely chopped garlic, olive, and capers mingle with the mashed up anchovies.  


I turned the heat to medium-high, threw in some olive oil, and in goes the anchovies mixtures.  I kept on moving the mixture around until I smelled caramelized anchovies.  

In goes the crushed tomatoes and stirring...  Then I put a mesh lid on (anti-splash when bubbling) and let it simmer, stirring occasionally.  

30 minutes later, eggplants are now charred and cooked.  

Some things I learned from this experience:  1.  Lube the pan liberally!  Not enough lubing causes sticking, burn, and pain, just like in real life;  2.  Flip the eggplant for better browning.  On the same line, if you have multiple tray on different levels, make sure you flip their position!  I was watching the eggplant slices very carefully so my damages were mostly under control, but this can end very badly.  Another tip is that the eggplants must be as dry as possible...  I’ll explain why in a moment because the whore finally got her fishnets on and IS READY!  


Took her 20 - 30 minutes... not so shabby huh?  The simmering allows the flavors mingle and concentrate the sauce...  more on why in a moment.  

While everything was cooking, time to prep the spinach, fresh mozz, and the remaining olives.  First, another family photo...


I chopped off the stems on the spinach, chopped the olives into big chunks, and the mozz into ~ ¼” slices.  The spinach stems got the finely diced treatment, and along with the spinach leaves, cooked in the microwave until wilted, about 1 minute.  I rung out as much water as possible in the spinach...  again, more on why in a minute....  (this minute is getting really really long...)  Here’s a shot of the spinach.

Now, time to build the eggplant parmigiana.  First, lube up the baking dish with extra virgin olive oil.  Then, place a layer of the roasted eggplant onto the baking dish.

I then threw in some spinach and olives....

Now in goes the sliced fresh mozzarella...  

Last item on this layer:  the Puttanesca sauce....  

Next layer would be a repeat:  a layer of eggplant....  

Spinach, olives....


Mozzarella cheese and a newcomer:  Parmigiano-Reggiano.  I forgot to add the Parm in the last layer, so I shaved in extra in this layer (and the next one) to compensate.  


Then the sauce!   I think the whore would really like this sandwiched position, don’t you think?  


One more layer of eggplant, spinach, olives...

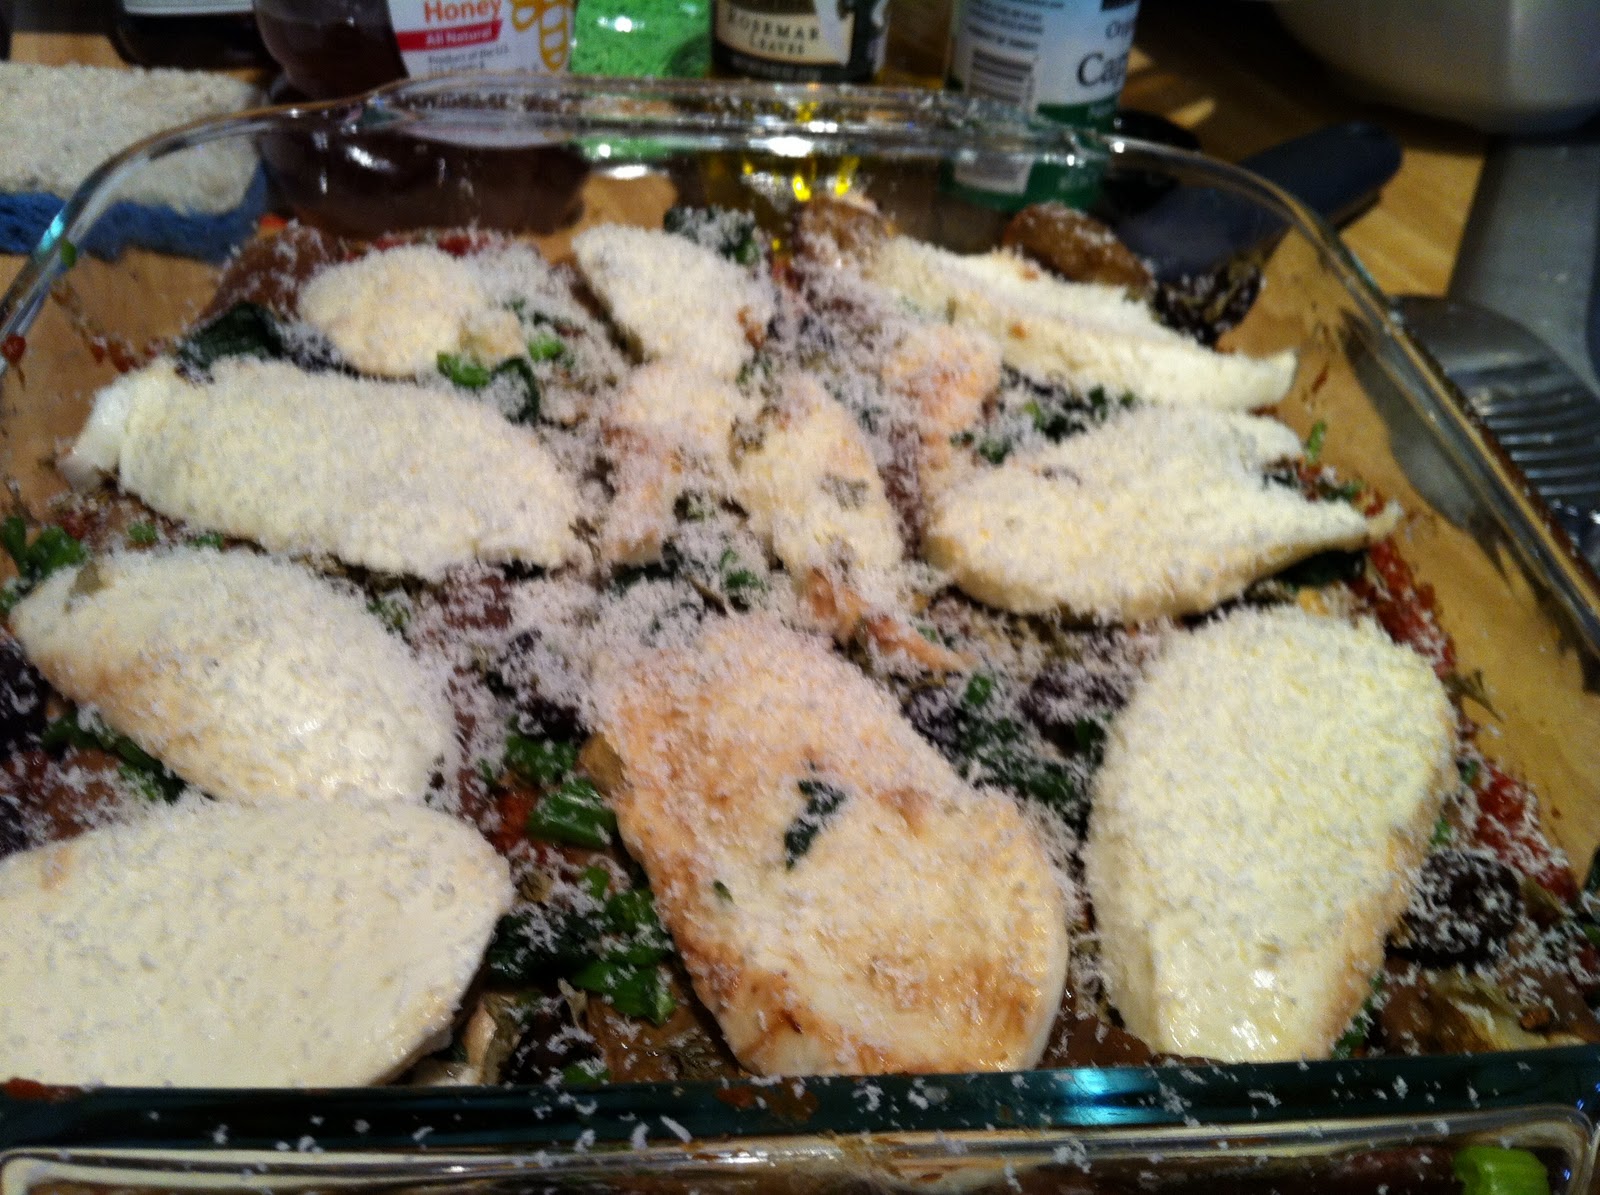
Mozzarella, Parm...

The last of the sauce!   I sprinkled some dried parsley on this layer.  

No bread crumbs so rolled oats would have to do....

I then popped this into a 350F oven for another ~30 minutes.  The original protocol asked for 15 - 20 min, or until the cheeses melted, I checked it frequently after the 15 minutes mark, but I liked mine a little more charred on top so I left it in for longer.  It would be up to you.  This is what it looked like after it came out from the oven.  

Remember:  the longer the cooking time, the more crunchy the top will be, and the spinach would probably turn more ashen-yellow.  The last part probably doesn’t matter because it would be all embedded into tomato sauce so you likely won’t see it.  

I let it rest for 5 minutes before cutting in.  Here’s a cut-up sliced shot:  

Noticed that the dish is dry:  there is no liquid running on the dish or the plate!  Remember I insisted that the eggplants and spinach must be dry, and the sauce should be concentrated?  This is where it pays off.  Both the eggplants and spinach contain a lot of water, which make them turgid when they are fresh (and that is a tell-tale sign of freshness on most veggies-- a wrinkly, wilted fruits or greens means water has evaporated and the item in question had been sitting around for a while).  When heated, the cell walls in the eggplant and spinach would break, leaking out all the water it retained while it was still alive.  In addition, the pressure applied with the stacking structure would further increase the water leakage.  If you do not roast the eggplant until a lot of the water is evaporated, or not ring out the spinach when finished cooking, all this water would end up in the final dish...  Definitely not good eats.  Sauce, also containing lots of water by nature, would worsen the situation.  By concentrating the sauce, you have paid additional “protection money”-- when the eggplant or spinach are oozing out water (it doesn’t matter how much you dry the food; it will still have some leftover.  Even dried pasta you get at the store aren’t exactly bone-dry-- too little moisture would cause the pasta to crumble into dust), the sauce will absorb some of those liquids and thin out.  The sauce will then in turn baste the eggplants and spinach, mingling all the great flavors.

Hopefully this will convince you to make your own Italian food at home and give the mafia Italian restaurant a boot.  Bon appetit!

Note:  

In my humble opinion, the whore sauce is not a whore sauce without anchovies.  Anchovies have a complex flavor profile that gives the sauce this seductive, pull-your-soul-in quality.  If you don’t like anchovies, here are your options:  

1.  Use less of it!  You won’t taste the fishiness in the sauce because it has so much going on.  If you can’t do 3, add 2.  If you can’t do 2, add 1.  Life is too short to be picky!  

2.  If you absolutely cannot stand anchovies, you can skip it.  The Neapolitan version of the Puttanesca sauce does not contain anchovies and it is still a puttanesca sauce, but it’s really not the same.  

Other words of cautions:  

3.  I do not recommend turning this dish into a meatatarian dish as the puttanesca sauce already has enough body (haha, get it? body...) to carry this dish.  Adding meat would not necessarily ruin the dish, but you would lose the opportunity to experience the whore in an aubergine environment.  

4.  If you would eat this as a leftover dish (and I think you can and should...  the flavors do not degrade over many nights, just like you would not forget a great night with a great courtesan for years to come...) and go with the oat option, be mindful that the oats will absorb some of the liquids and gelatinize.  That should not be a problem, and it may be an added bonus from keeping the food dry... if you count that as an added bonus.  

5.  Speaking of leftovers, the best way to reheat this is microwave slightly first then put it under the broiler for a couple minutes to get the top crunchy again, but I understand that can create more pain and frustrations if you’re really hungry (and you would absolutely be frustrated because no one can resist the smell of a good whore.)